For the longest time, I thought poached eggs were the domain of fancy brunch spots and chefs with intimidating tall hats. I’d try it at home, and it would end in a pot full of wispy, ghost-like egg white tendrils and a sad, naked yolk sinking to the bottom. It was a disaster. I gave up for years, convinced I just didn’t have the magic touch. Then, a chef friend watched me struggle once and said, “Clara, you’re trying too hard. And your eggs are too old.” That was it. That was the secret. Fresh eggs and a little vinegar in the water. This method is my foolproof, no-stress, no-swirling-necessary technique that gives you that beautiful, pillowy, restaurant-quality poached egg every single time.
Quick Look
| Prep | Cook | Total | Feeds | Level |
|---|---|---|---|---|
| 5 mins | 3 mins | 8 mins | 2-4 people | Intermediate |
Why You’ll Love This Recipe
- It feels fancy but is secretly simple. Impress your friends, your family, yourself.
- They’re light and delicate. No added fat from cooking oils or butter, just pure, clean egg flavor.
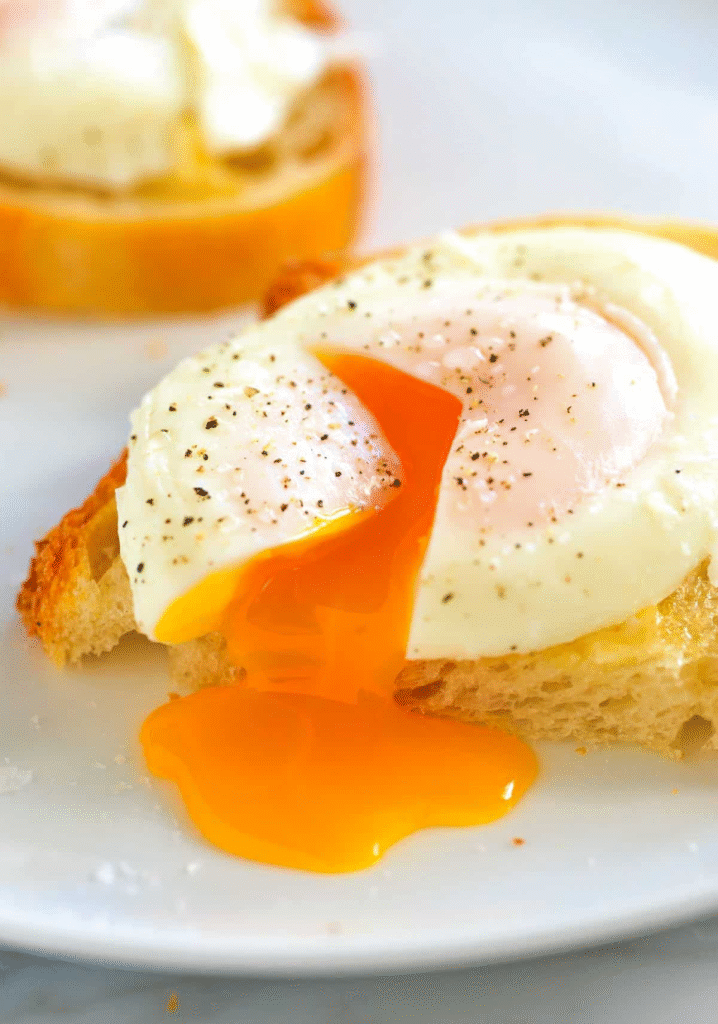
- The ultimate topping for Eggs Benedict, salads, or bowls. That runny yolk is nature’s most perfect sauce.
- Once you master this, a whole world of recipes opens up.
Grab These
- Very fresh, large eggs (as fresh as possible—this is critical for a tight, neat white)
- 1-2 tablespoons white vinegar or distilled malt vinegar
- A large, wide pot or deep skillet
- A slotted spoon
- A small fine-mesh sieve (this is the real game-changer, trust me)
Let’s Make It
Fill your pot with about 3 inches of water. You don’t need a huge, rolling boil; you need a gentle simmer. Bring it to a boil, then reduce the heat until the water is just shivering with small bubbles breaking the surface. Add your vinegar. I know, some people hate the vinegar tip, saying it flavors the egg. I promise, if you use a reasonable amount (about 1 tbsp per quart of water), you won’t taste it. What it does is help the egg white coagulate faster, preventing those dreaded wispies.
While the water comes to a simmer, crack one cold egg into your fine-mesh sieve set over a small bowl or the sink. Gently swirl it around. You’ll see all the thin, watery part of the white (the albumen) drain away. What you’re left with in the sieve is the thick, firm white that will cling tightly to the yolk. This is the single most important step for a perfect, compact poached egg. Gently transfer this now-tidied egg into a small ramekin.
Holding the ramekin just above the surface of the simmering water, gently tip the egg in. It will sink and look a little sad for a second, but then it will start to float and set. Repeat with as many eggs as you can fit without crowding the pot. Set a timer for 3 minutes for a firm white and a completely runny yolk.
After 3 minutes, use your slotted spoon to gently lift an egg out of the water. Give it a little poke with your finger. The white should feel firm and set, but the yolk underneath should feel soft and jiggly. If it needs more time, give it another 30 seconds. When they’re perfect, lift them out and transfer them directly to a plate lined with a clean kitchen towel or a piece of paper towel to drain any excess water.
Nutritional Facts (Per Serving – 1 egg)
| Nutrient | Amount |
|---|---|
| Calories | ~ 70 kcal |
| Protein | 6g |
| Carbohydrates | 0g |
| Fat | 5g |
| Fiber | 0g |
| Sugar | 0g |
| Note: Values are estimates |
Variations & Add-Ins
- The “Make-Ahead” Miracle: You can poach eggs ahead of time! Cook them for 2.5 minutes so they’re slightly underdone, then plunge them into an ice bath. Store them in the fridge in cold water for up to two days. To reheat, just drop them into simmering water for 1 minute. Lifesaver for a crowd.
- Flavor-Infused: Add a bay leaf, a few peppercorns, or a sprig of thyme to your poaching water for a very subtle aromatic flavor.
- The “Coddled” Style: If you have egg coddlers, butter them, add an egg, season, screw on the lid, and place them in simmering water for 6-8 minutes. A different, but delightful, experience.
Serving Ideas
- The classic: on a toasted English muffin with Canadian bacon and a generous pour of Hollandaise sauce for Eggs Benedict.
- On top of a pile of sautéed greens like spinach or kale, maybe with a sprinkle of chili flakes.
- Sitting proudly on a stack of crispy, roasted asparagus spears.
- On a piece of sourdough toast with smashed avocado and everything bagel seasoning.
Storage & Reheating
As mentioned in the variations, you can store poached eggs for up to 2 days. Keep them submerged in cold water in an airtight container in the fridge. To reheat, gently lower them into simmering water for 60 seconds. Don’t microwave them, or they can explode.
My Two Cents (Pro-Tip)
The sieve. It’s not optional for me anymore. Straining out the loose, watery white is the difference between a professional-looking poached egg and a frilly, chaotic mess. It takes two seconds and solves 95% of home-poaching problems. That, and using the freshest eggs you can find.
You Asked, I’m Answering (FAQ)
- “Do I have to use vinegar?” No, but it really, really helps, especially if your eggs are less than perfectly fresh. The sieve method minimizes the need, but I still use both for guaranteed perfection.
- “What about the swirling vortex method?” You can create a whirlpool in the water and drop the egg in the center. It works okay for one egg at a time, but I find it fussy and it falls apart when you’re trying to cook for more than one person. My method is more reliable for batch cooking.
- “My yolk broke when I cracked it. What now?” Abort mission! Either use that egg for scrambling or save it for a different purpose. A broken yolk will not poach correctly. This is another reason the ramekin step is so helpful—you can see if it’s broken before it hits the water.